Showing posts with label tutorial. Show all posts

GoToMyPC Remote Desktop App Access the Computer via iOS

7:37 PM

(2) Comments


GoToMyPC is an application that allows users to access the computer via an iOS device from anywhere. Access is not only just to see the files stored on the computer but all the functions like user actually being in front of a computer monitor, such as running the file, program, and even connect to a network owned computers.

This app connects iPad and iPod Touch through WiFi or 3G and 4G cellular networks. Meaning users can actually access to connected computers from anywhere. This application also has a feature that can lock the keyboard on and off screen monitor being accessed to avoid double control.
GoToMyPC Remote Desktop App Access the Computer via iOS

Developer  : Citrix
Device  : iPhone 3GS, iPhone 4, iPhone 4S, iPhone 5, iPod Touch, (3rd Generation), iPod Touch (4th Generation), iPod Touch (5th Generation) and iPad.
Minimum Requirements  : iOS 4.2 or Later.
Download  : AppStore
Price  : Free
File Size  : 10.5 MB

Read more >>

How to insert Image in Facebook Chat

8:47 PM

(2) Comments

At present many interesting features provided by Facebook to captivate the hearts of lovers facebook to fix the constant of the side view, and even chat facilities are provided, have a chat before the fix by adding Emotion, and even video chat, but this time re-adding facebook features like the emotion that one could as add a picture to chat. You can insert an image via Facebook chat.

One way is to use Facebook Chat facility is owned by Maker Codes Smileyti.me site.
Facebook Chat

You can upload your images to be sent at the site smileyti.me. Next, the code will appear on the page Chatting up this site. And, if you want to send the picture, you can simply copy-paste the code on your Facebook page chat, and the image will appear.

Create Facebook smiley chat codes from any image and post them into your Facebook chat.

How to insert Image in Facebook Chat
Get started with 3 easy steps:

Step One > Open smileyti.me > Click the “Choose File” Button and choose an image from your computer

Step Two > Click the “Upload Now” button
upload image to Facebook Chat

Step Three > Paste the code to Facebook Chat
Example :
[[375037352572362]] [[375037339239030]] [[375037342572363]] [[375037345905696]] [[375037349239029]] [[375037472572350]] [[375037469239017]] [[375037479239016]] [[375037475905683]]
[[375037462572351]] [[375037569239007]] [[375037562572341]] [[375037565905674]] [[375037555905675]] [[375037559239008]] [[375037669238997]] [[375037665905664]] [[375037672572330]]
[[375037675905663]] [[375037682572329]] [[375037772572320]] [[375037775905653]] [[375037762572321]] [[375037765905654]] [[375037769238987]] [[375037955905635]] [[375037939238970]]
[[375037962572301]] [[375037929238971]] [[375037959238968]] [[375038099238954]] [[375038102572287]] [[375038105905620]] [[375038109238953]] [[375038112572286]] [[375038269238937]]
[[375038262572271]] [[375038272572270]] [[375038295905601]] [[375038292572268]] [[375038485905582]] [[375038479238916]] [[375038475905583]] [[375038472572250]] [[375038482572249]]
[[375038632572234]] [[375038639238900]] [[375038642572233]] [[375038635905567]] [[375038629238901]] [[375038765905554]] [[375038755905555]] [[375038762572221]] [[375038752572222]]
[[375038772572220]] [[375038902572207]] [[375038925905538]] [[375038899238874]] [[375038919238872]] [[375038922572205]] [[375039145905516]] [[375039155905515]] [[375039152572182]]
[[375039142572183]] [[375039149238849]] [[375039252572172]] [[375039232572174]] [[375039239238840]] [[375039249238839]] [[375039235905507]] [[375039412572156]] [[375039405905490]]
[[375039389238825]] [[375039399238824]] [[375039409238823]] [[375039552572142]] [[375039555905475]] [[375039545905476]] [[375039559238808]] [[375039549238809]] [[375039779238786]]

And the result is like this :
insert Image in Facebook Chat
that's it, so make a different chat with your facebook friends
Read more >>

How To Move iPhone Applications to Computer

8:50 AM

(0) Comments


How To Move iPhone Applications to Computer ~ Various applications are sold in the App Store continues to grow day after day. Is now available not less than 200,000 kinds of applications both free and paid.
One of the advantages of buying apps in the Apple App Store is the integration and compatibility of applications on a number of gadgets.

For example, we buy games or ebook applications through the iPhone, then we want to move to the iPod Touch, iPad or MacBook can be done easily.
That way, we do not need to buy two or three applications together to complete the collection of games or ebook into our Apple devices.
Move iPhone Applications to Computer

Easy to do so. But before moving all paid applications from the iPhone (or iPod Touch or iPad) to a computer or a laptop, be sure to authorize the computer before being connected to the device. To authorize, following step-scarce:


  •      Open iTunes
  •      From the menu "Store", choose "Authorize Computer"
  •      In the dialog box that appears, the default Apple ID button. If you have an AOL account, select  AOL.
  •      Enter your Apple ID or AOL ID following his or her password, then click the "Authorize"


After we connected the device to the computer and the icon that appears in iTunes, you can choose "Transfer Purchases" from the "Your device name" in the menu "File". All applications that we buy will be moved to a new Mac. Move iPhone Applications to Computer Good LuCk
Read more >>

How to Change Email Settings in Facebook

1:03 PM

(0) Comments

How to Change Email Settings in Facebook ~ Some time ago, the number one social networking world, Facebook has changed the email users using address@facebook.com. This they did without any notice.
so that measures, many facebooker who was troubled. Not only that, the new email delivery to mobile users rose up mess.
Change Email Settings in Facebook

However, it turns out you can also change the email addresses with ease

The following are the steps you have to do.
  • Access your Facebook timeline
  • Go to page About
  •  There, you will see Contact Info. There, you will see there an email with address@facebook.com. You can edit the address. 
  • On the Contact Info page, you will be able to see two email addresses. You can choose to hide or display the email address in the timeline. 
Unfortunately, you will not be able to delete the email from Facebook. However, you can change the name of the email as you wish. And, these changes can only be changed once. Change Email Settings in Facebook
Read more >>

Free Credit Card From Infolinks

6:55 PM

(6) Comments

This time I will share how to get a Free Credit Card from Payoneer through Infolinks. Only less than one month after our application in the Approve, we will get the information if the credit card will be mailed to the registered address within 10 working days and up to 25 working days for delivery outside the U.S. This proved a credit card to my house within a period of less than one month, then indeed the right time according to a notification email from Infolinks..

following steps:

  • Login using your account on Infolinks

  • Click on "My Account" »see the" Payment Details "and click" edit "
Free Credit Card From Infolinks
  •  Next select the payment method to a 2 "Payoneer Prepaid Mastercard"
Free Credit Card From Infolinks
  • If you've made ​​the choice to 2 as above, continue to click "Next"
  • Click on the top it says "Payoneer Prepaid Mastercard", you'll be taken to the registration form Payoneer credit card
Free Credit Card From Infolinks
  •  Fill in and complete the third phase of registration in accordance with your personal data
Free Credit Card From Infolinks
  •  Once completed do not forget to check all three main rules of Payoneer and click "finish"

Note: Complete your order for the data content delivery to its destination
Read more >>

Unknown

Playing Playstation on Android

10:19 PM

(1) Comments

Playing Playstation on Android
To play a few games in the PS1 games you need a PS1 emulator and psx bios for your android Phone. You can download it at:
http://www.mediafire.com/?8wkswy7w3csaw28 (psx4droid),
http://www.mediafire.com/?bdkai91mzw9wrgk (FPse),
• or in the android market.

Once the emulator is downloaded, there are a few steps more settings you have to do. Well, the steps are:

1. Make a special folder on an external SD card to put the bios file.

For example: Game Psx. To facilitate you in its manufacture, use management applications or files you can download the android market. OI file manager or astro file manager for example.

2. Install PS-1 emulator application on your android HP (FPse).

3. Install applications psx bios.

4. After that do the bios settings. Go to settings - system - Bios Loading.

5. Then the bios file browser in accordance with the folder that you created earlier.

6. If the steps are complete, do not forget to save your settings are not changeable. Click or tab Default Config menu Save (save as the default config).

The next step you just browse the PS-1 game to be played. PS-1 game for his own use an extension or format game ISO / Bin not an exe. Stick to its own setting, you can access the input menu when the game is being played, will stay in check which button you want to show. Then save.

But keep in mind also that not all PS-1 game can be played on android Phone, android version that also supports file fun is only 2.1 (Eclair) and above. (tabloidpulsa.co.id)


Read more >>

Activate Flip 3D by Mouse

2:43 AM

(0) Comments


Activate Flip 3D via Mouse
Windows operating system is now known as the reliability of the graphics display, and one of them is a 3D flip. Well, below is how to enable the 3D flip by moving the mouse at the end of the screen, but in fact the trick is not easy, because often we find the failure.
Well, in anticipation of failure, you can use the Vista Flip 3D activator. You can download the http://notj.net/flip3D/windows_vista_flip_3d_activator.html
you can just install the tool, and check by moving the cursor to the end of the screen.
You can just mark the desired mouse button. As long as you turn on the 3D flip. You can use the mouse scroll the window, and click to activate it.
This application is also able to display your favorite wallpaper.
Utility is quite light and small, with consumption of the system only 2mb. So you do not need to hesitate system resource will be exhausted
Read more >>

Download Torrent life of IDM via ziTorrent

11:02 PM

(1) Comments


torrent
Typically, to download Torrent files in use applications like Torrent client uTorrent, Vuze, Bit Comet, and so forth. Judging from the speed Download, Torrent file depends on the seeder and the Lecher. If the seeder more than the number of Leecher, then obviously the download speed will be more secure, if not necessarily vice versa.

We have available a wide range of web torrent client that is able to download the torrent file and store it in the server site. Later, the file can be downloaded by the downloader application such as Internet Download Manager (IDM) for example, because it was formed direct link. Torrent one web client that can be used is ziTorrent.

The steps that need to be done:
Zitorrent
1. www.zitorrent.com to enter the site, and then do the registration by pressing the option to sign up. In the registration process, you only need to enter username and email address. Click the Create my account.

2. Open your email address to receive a password, then you will be taken account my first page. Therein shown some information about the download. For a free account that is in use, you have a 30 GB quota and can only download 2 files simultaneously torrent. In addition, the maximum file size that can be downloaded torrent is 5Gb.

3. To start the download, click on My Downloads. Click the Browser button and select the file. Torrent that you store on your hard drive. Click the add a new torrent to start downloading.

4. can be seen at the bottom of the page contained the name of the file being downloaded. His status is downloading. you can see the download by clicking the name of an existing file.
Internet Downliad Manager
5. download process will run and the information can be viewed, such as the speed of transfer, then the number of seeder and peer (leecher).

6. If it is done, then his status will be completed. Click the name of the file to download using IDM. Worthy of note, the file that is ready for download only in the store 24 hours, after which it will be deleted from the server.

7. In addition to using the torrent file, you can also use the torrent file link separately to generate Direct Link, so no need to download first. Open a torrent file to be downloaded, then click the button on the page past a torrent link and paste the link in the box and click the add a new torrent.
Read more >>

Sugar Sync Online File Storage

12:37 AM

(2) Comments


Sugar Sync Online File StorageSugar Sync Online File StorageSugar Sync is a service that offers free online storage with a capacity of 5 GB. Just like Dropbox, Sugar Sync allows you to perform automatic backups of all your photos and videos taken with your phone camera.

With Sugar Sync Manager, you can also synchronize with a desktop application that can run on PC and Mac. Sugar Sync lets users select the folder that you want to synchronize. This is different from other applications that only perform synchronization on all files or folders in place within a specific folder in the My Document. So if you install a desktop application on more than one computer then when you login to the Sugar Sync website, you will see a list of computer and folder names are synchronized. As for the sync to all computers and devices, you simply drag and drop files to the Magic Briefcase folder in the My Documents.

Other features such as collaborator with Sugar Sync is more advanced because you can choose to allow your friend to just be able to read the contents of the shared folder or even go to edit the contents of the folder that you share.
Read more >>

Tips Windows Phone 7.5 Install Applications / Games from Marketplace

4:39 AM

(8) Comments

Windows phone 7.5
if you have an iPhone application store called the Apps Store, Android Market and Android Have / Google Play, so Windows Phone also does not want to lose a place to download and install the application / game that is Marketplace. Well, for those who are new to Windows Phone and want to download and install a free application from the marketplace, here are the steps:

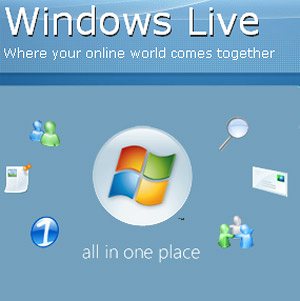
A. Marketplace open the menu, if this is the first time you open the marketplace, then this application ask you to sign in with a Windows Live ID. Previously, you must register (list), to have the Windows Live ID.
2. Windows Live ID account bias obtained by enrolling when you first turn on Windows Mobile Phone. From here you can have the keys create one. It also can visit the site www.live.com via pc, select the sign up.
3. Fill each column with the required information that is user Windows Live ID, Password, and Email address of the main, follow the next steps by pressing the next button.
4. Select your country / region from the list, enter your date of birth, and then select Accept at The Marketplace Terms of Use.
Windows Live ID5. after you press a key or Accept received, a confirmation screen will automatically display the gamer tag, or re-view the first application details to complete the installation or purchase, and select Done.
6. After that you will be prompted to install the Sky Drive is an application provided by Microsoft, to save the file and can access it from virtually any device, anywhere, and anytime, then select install.
7. after that you will be prompted to restart the phone by selecting a close, if you receive an error message "App is not available" or "item not available" restarted marketplace and try again.
8. From here you can already download the application. Marketplace of how open the home screen or a list of applications.
9. looking for an application / game in want and then install, select install to download and install, choose Allow to continue the installation process, wait until the install is complete, the application is ready to run, into the game installation folder games.
Read more >>

Change the Symbian Phone Become Hostspot

9:19 AM

(0) Comments

Nokia symbian phone users do not need to envy the mobile OS Android and iPhone. If the phone with the latest operating system is called a bias into the process of tethering via wifi hotspot, the phone also turns can Symbian. Although in different ways and have to use third-party applications.
Change the Symbian Phone Become Hostspot

The steps that must be done:

1. Install JoikuSpot application through Ovi Store by running the Ovi Store, Ovi Store search of applications by selecting the Search menu and then type the JoikuSpot. Then select the application


2. Select Download to install this application on mobile phones JoikuSpot. Wait until the download and installation is completed, once completed, Select Launch to run the application JoikuSpot. Then the application will give the command to restart the phone and complete the installation process.
Change the Symbian Phone Become Hostspot 
3. after the restart process is complete, select the application by selecting the JoikuSpot icon in the menu, then the disclaimer window will appear, then press OK.


4. when a prompt appears "allow sharing Your Internet Connection with External Devices?" select Yes.


5. select APN connections are used ( with sim card you are using). Wait until the process is complete.


6. to access the Hotspot, connect your PC or laptop on a symbian phone that has become a hotspot, turn on the wifi connection and search for JoikuSpot HotSpot then right-click on the connection JoikuSpot and then Connect.


7. wait until the connection is connected, if the laptop is connected to wifi then you are able to use the internet on a laptop using JoikuSpot HotSpot

 
8. Use the Settings menu to set as desired, to finish Select Options> Stop to stop the connection JoikuSpot


Read more >>

Wondershare MobileGo Android

7:49 PM

(1) Comments

Wondershare MobileGo Android

Wondershare MobileGo Many Functions of the Application 

"One application of this type is worth a try is the "Wondershare MobileGo". Like the Android SDK, Wondershare MobileGo also features "screen shot."

Wondershare MobileGo AndroidHp connected with PC, in order to synchronize the various functions generally require the PC Suite or mobile phone tools built from HP. For Android, usually known as SDK. But the obstacles, a great addition to the installer file, you are also required additional file updates.

Well, that simpler is better you use the "Mobile Manager" third party. With a much simpler process, the application is true that the facility did not offer much different from the android SDK.

For example, the backup / restore data, transfer contacts, transfer audio / video / photos. Read / create / reply sms to install / uninstall an application. One application of this type is worth a try is the "Wondershare MobileGo". Like the Android SDK, Wondershare MobileGo also features "screen shot".

The steps for using this application :

1. Download Wondershare MobilGo Application of
  http://www.Wondershare.com/android-manager/
 
2. install to the PC, run it and connect the HP to PC using data cable or WiFi

 
3. If HP is not already installed the USB drivers on PC, Wondershare MobileGo application will automatically
  download it from internet and install it to your PC.

4. once connected, you are utilizing the facilities offered in this application.


Read more >>

Access BlackBerry Messanger from PC

7:35 PM

(6) Comments

Access BlackBerry Messanger from PC
Almost all BlackBerry users would agree that the BlackBerry Messenger is so addictive, up-to some RIM smartphone users are claiming that the reason was to survive using the BlackBerry Messenger application is exclusive even though tempted by other operating systems are said to be smarter. 

Not new if the user spends most of his time when holding the Blackberry to BBM's. But you know, there is an unusual way of fun for fuel-an? Namely by using a PC, so you can be faster to type using a computer keyboard and read more comfortably through the monitor.Here's how:

1. Download application at http://www.fixmo.com/fwm Fixmo Web Messenger using the BlackBerry browser.Once the download is complete, the application will install automatically.


2. Perform the required settings for Finalize installation Fixmo Web Messenger application. 


3. first time using this application, you need an Fixmo Web Messenger. Select "I need an account" to create an account. 

4. Enter your current email address, create a password (password) and repeat on the form provided. Click Register. 

5. If successful, it will connect and cancel the display appears, select Connect to directly connect the application.

 6. Now turn on your PC and open the internet browser. The way we did this time web-based, unlike the methods that have been discussed previously, by using the softwere "SOTI Pocket Controller Pro". Go to Page http://www.fixmo.com/fwm. 

7. enter your email address and password you created earlier8. now you have a bias with an easy-BBM using the PC.
Access BlackBerry Messanger from PC

Because web-based, you can actually control the fuel is not only through the PC, but through another device that has a browser. Blackberry you also should not be adjacent to the PC. Provided that the application Fixmo Web Messenger on Blackberry connected (run)
Read more >>

Free Calls From android

8:26 PM

(0) Comments

Free Calls From androidAlthough many carriers that offer cheap phone packages, but to communicate using the telephone is still the prediction is expensive. Simple and inexpensive solution is to utilize the facility "Push To Talk".
In Mobile, Walkie Talkie service that utilizes the same data path that are now more affordable. Or you can take advantage of free WiFi hot spot.

Simply by installing applications on HP Talkie Walkie Zello Android, do a little setup and you will be free to communicate with users of the same application. Of course, like a Walkie Talkie alternately.
For who wants to try it, the following steps:

Download and setup

1. Walkie Talkie Zello download applications from Google Play (Android Market). Next, install it to your hand phone Android.
2. Once installed and running, Walkie Talkie Zello will ask you to create an account. Content according to the data needed

 How To  use

1. Click the menu separately add a contact, and wait until your friend confirm it.
2. To start talking, click on your friend's account, here, you will find several options menu.
3. Press a while "Hold and Speak" to hear a "beep" and a connection indicator changes from blue to red. You just talk. Further off "Hold and Speak" to give your friends a chance to speak.

Additional Features

Other facilities are also provided Walkie Talkie Zello this application include: adding Channel Chat (Chat Room sort of), set the account status, add a status message, History conversational setting up alerts and interfaces,
Read more >>

Unknown

,

Transfer File Via Wi-Fi

6:23 PM

(2) Comments

Transfer File via Wifi
Transfer the file would have you always did, but what about the file transfer via Wi-Fi? Have you ever done a large-capacity file transfer using Bluetooth? Of course not because it takes a lot of time in addition to the transfer process is also sometimes abruptly interrupted when HP moves too far out of reach dai. Then the solution is a bias to do to transfer files without having to depend on the PC and data cable?One solution that you can do is to use Wi-Fi as a means of transferring files as transfer files between your laptop in the same WLAN network. In addition to the higher transfer speeds, you can also transfer files without the limits of the data being transferred.

step by step to Transfer files via Wi-Fi1. Download Applications Wi-Fi File Transfer from Google Play.


2. then do the installation into your android device. You should make sure to install the application from Antos DR because Google Play there an application of the same name but come from different development.


3. before the application you run, do not forget to turn on and connect the HP to a Wi-Fi is available, so that both Hp to be able to exchange data with each other to transfer files, you also need to do a similar installation on Hp receiver.


4. after that, run the application, it will display the option the send file, receive file and so on.


5. if you want to send a file, you just touch the send button and select the file that file will be sent


6. whereas for Hp receiver, you just touch receive files, then HP will immediately recognize the sender's IP address Hp receiver and ready to transfer data.


7. when it says "Found IP receiver Sende Click File to Start Transfer", meaning the device is ready to transfer, continue to touch the send button File


8. Wait until it says Success, which means file transfer has been successfully performedA few tutorial File Transfer via Wi-Fi and of course this application is very useful for those of you who frequent file transfer.
Read more >>

Unknown

, ,

Quick editing fotoshop with shortcut

1:44 AM

(0) Comments

we know to complete the work in fotoshop we need some way to work in can be done with maximum fotoshop, here is a keyboard-keyboard that is used to speed up the work, some of which has not been known by the designer though and some are also only useful in Photoshop CS5. Immediately, we started

1. Drag-Zoom

Command / Ctrl + Space + Click and Drag to left / right, the quickest way to zoom in and out (only on the CS5 is supported by the GPU).


 Alt + Shift + Right Click (Windows) or Control + Option + Cmd + Click (Mac) (CS5 is supported only on the GPU).

3. Bird's Eye View

press H + click, then release the mouse reposition the display to enlarge the picture again. The quickest way if you need to work with large image size and fit it to the screen.


Ctrl + Alt + Right Click (Windows) or Control + Option + Click (Mac). Move the mouse to the right / left to change the size and up / down to change the hardness, these shortcuts are only valid in CS5. As for the CS4 can only change the brush size, and you can change the color of the brush preview in the Preferences / Cursors, you also have to enable GPU to be able to see it.

5. Straight-line drawing

press Shift to drive to the drawing tool.

6. Move

press Command / Ctrl is the fastest way to move / berpinda canvas in Photoshop

7. Pan (Shift + Space) and Zoom simultaneously in all the documents

Shift + Ctrl + Space (Windows) or Command + Shift + Space (Mac), is the fastest way to compare or work on more than one image at the same time.


8. hiding Panels
press Tab, click the tab to bring it back again.

 
9. Full Screen Preview Files from the Mini-Bridge

Press Space and arrow keys

10. Changing the Text Size

whole blocks of text that will resize and press Command / Ctrl + Shift.

11. Small or Large Changing Font

Command / Ctrl + Shift + K, a quick way to switch from lowercase to uppercase. Make sure you do not activate the Caps Lock to be able to use these shortcuts.


12. Tracking and Kerning

Alt / Option + Left or Right arrow keys are useful to equalize the spacing between characters. If you select a word, line or paragraph as a whole then you can change trackingnya, whereas if you click between two characters


13. leading


Alt / Option + Up or Down arrow keys, a quick way to change the distance between the selected lines

 
14 . Baseline Shift
  
Alt / Option + Shift + Up or Down arrow key, a quick way to use one layer of text that have different positions

15. fill

Command / Ctrl + Backspace, Foreground color, Alt / Option + Backspace, Background color, Shift + Backspace-Fill Options. A quick way to add color to the choice or change the color of text and vector shapes.


16. Reset Dialog Box

press the Alt / Option + Click Cancel

 
17 . Change the Opacity and Fill

Shift + enter a number, this will change and fill opacity value of the selected layer (or even more than one layer at a time in CS5).


18 . Invert the colors of the Selected Layer or Layer Pixel Mask

Command / Ctrl + I, the fastest way to membalikka the visible part of the layer if you invert the layer mask color
19 . Switch to Cursor Precice for Musical Picture

press the Caps Lock if you do not want to see the edge of the brush.

20. reset Preferences

Ctrl + Alt + Shift (Windows) or Command + Option + Shift (Mac) when Photoshop is opened, if you want to start with the default user interface settings and hold this button for Photoshop is opened (loading).

21. Switch from color Foreground / Background

press X

22. display Mask

  Alt / Option + Click on Layer Mask, a good way to clean the masking after the selection and use the button again when you want to return to normal view
23. Disable Mask

Shift + Click on Layer Mask

24. Intersection of Selection

Alt / Option + Shift + click with selection tool during the selection process more than one layer, an easy way to store only a certain part of the selection options.

25. All combine to Layer New Layer

Ctrl + Alt + Shift + E (Windows) or Command + Option + Shift + E (Mac)

improve pagerank and thousands of backlinks
How To SEO Optimization blog with Twitter
About Search Engine Optimization for Blogs – SEO
via Vita/KbriT 
 
Read more >>

Create a Timeline/kronology Facebook New

7:51 AM

(6) Comments


Lately Timeline view facebook a warm conversation in society, not because something very excited yet because facebook is starting automatically upgraded at some facebook, actually this look long, but maybe for some people who do not enjoy the view, for that I will share ways to make an appearance in Timeline facebook  you with three ways, .. ok...

Here I give a tutorial to enable facebook with 3 steps.

  1.      Open a page about the timeline here http://www.facebook.com/about/timeline
  2.      Then click Get Timeline / Get chronology.
  3.      Then click Publish Now / Publish Now.

Now try to go into your profile, certain timeline is active, and please enjoy the new look of the timeline or also called kronology facebook in your account. not easy, please share to your friends.
Avoid viruses and spam on facebook
Activate the video call on facebook
hide the page owners on facebook
Read more >>