Tutorial Install Ubuntu 11:04
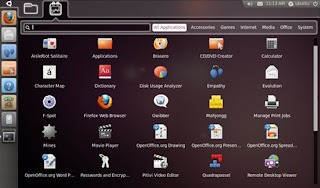 before How To install Ubuntu 11:04
Ubuntu 11.04 or Natty Narwhal is arguably the successor or repair of Ubuntu 10.10, which is very clearly we see the difference of the two generations are the generations of 10:10 and Gen 11:04, 11:04 is now present in the form of charming with a very different changes generations of predecessors, just as previous generations did not have the Icon on the desktop, but at 11:04 is a lot of play on the desktop, ubuntu 11:04 nicer comes fast and exciting with a color cast a lure.
Ubuntu 11.04 has Unity Desktop as the default desktop (although classic desktops are also available in login menu), instead of GNOME as you expected (because Ubuntu has been using gnome from the beginning). Some other features has been added – e.g Ubuntu Software Center has now ratings (in terms of stars) and reviews(in the form of comments) available for each application, Windows options has been shifted to panel (top),which appears on Mouse Hover…and so on. Ubuntu has now become the most popular Linux distribution among the desktop users. it’s open source, free, user friendly, fast and in short ..it’s a lot of Fun!
Ubuntu 11.04 can be installed in many ways – You can install it from USB(Universal Serial Bus) or CD (or you can just boot your system from Live CD/Pendrive without affecting your existing operating system on your computer). In this post, I’ll cover both the methods – step by step with full explanation - installing Ubuntu from USB as well as from CD/DVD. This guide will help you in installing Ubuntu in parallel with other OS like Windows 7, if you want only Ubuntu, then it’s much easier, but not recommended if you play a lot of Games or you use some softwares that is windows dependent.
Installing Ubuntu 11.04 from USB Drive
step #1 : Download the ISO Image from it’s official website. Select the correct architecture and download the iso file.
step #2 : Create a bootable USB using Universal USB Installer (a windows application that will create a bootable/live USB from the ISO file of Linux Distros, it supports a number of Linux Distros including Ubuntu 11.04 ).
First, Download USB Installer and execute it, you will get a windows something like this (On Windows 7) -
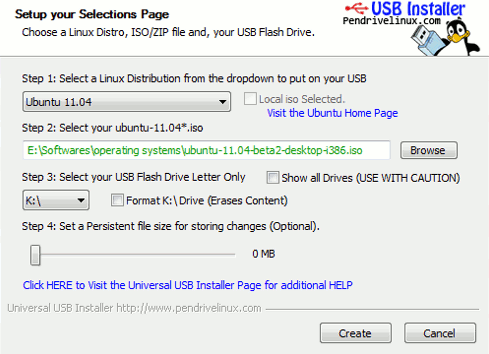 Select the Ubuntu 11.04 in Linux Distribution menu and locate the ISO File(You got it in step #1), although in most of the case it will automatically detect it. Now, select the USB Drive, which you want to make bootable, check the format option if you haven’t already formatted it. Then the click on Create button to begin the process..wait for few minutes until the installation process is complete.
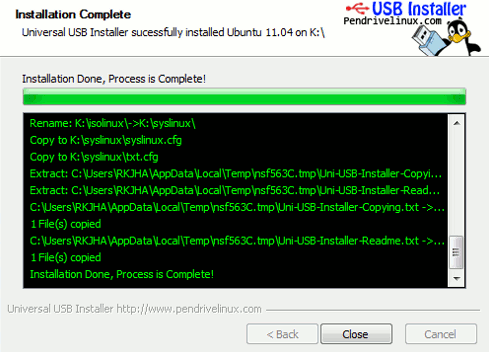
step #3 : Now restart your computer and boot from USB (If there’s any problem then Change BIOS settings to enable USB booting or change the priority order..). Then select – install Ubuntu to your hard drive from boot menu or click on ‘install Ubuntu’ after live booting from USB. Now a lot of screenshots(That I’ve taken during the installation stage) will help you -
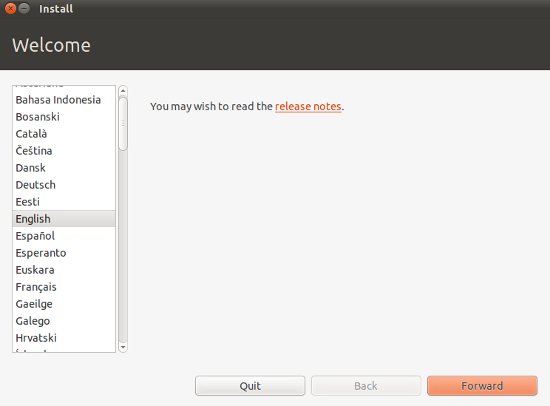
After selecting the language, click on Forward button. In next window, you will be asked to ensure that – your system satisfies its minimum requirements – like 4.4 GB Drive space, and it’s recommended to have Internet Connection (Preferably Wired,Wireless might works but I haven’t tested) during installation (so that it can download the necessary packages and updates)
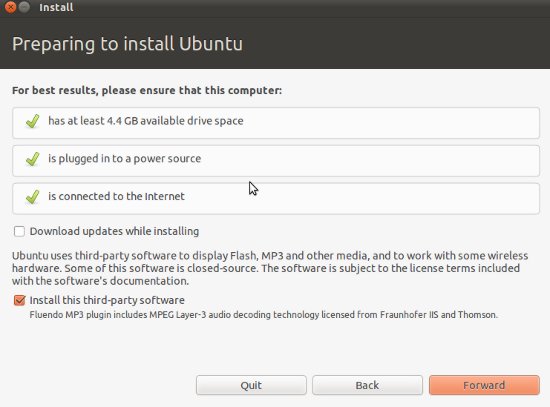
step #4 : Now this is the most critical step, where most people feel difficult in dealing with Ubuntu or any other Linux Distros.
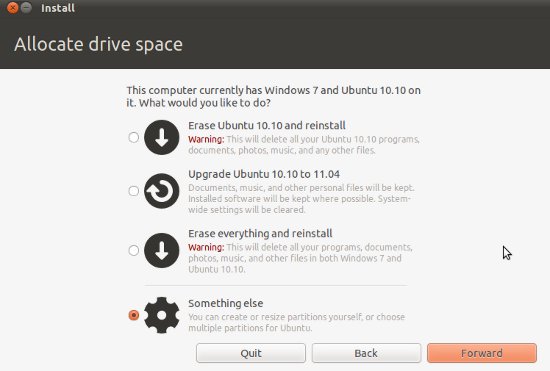
If you haven’t installed any other version of Ubuntu then you will get only two option -
Option – 1 : Erase Everything and Reinstall – it will delete everything (all the data/files and other OS like Windows 7) and reinstall Ubuntu 11.04 on your hard drive. If you select this option then you can skip few steps, although it’s not recommended, better go for second option.
Option – 2 : Something Else / Advanced Partition – it’s not so difficult as it seems. No files will be deleted and if you are using Windows 7 and want to use both Windows and Ubuntu in parallel, then this is the correct option for you. When you choose this option 2nd,
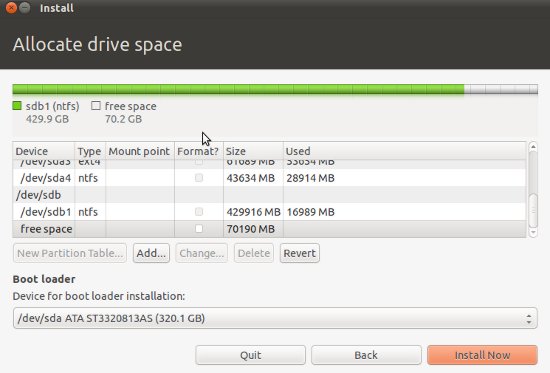 Now select the hard drive(if you have more than one), then the partition, where you want to install. After selecting the partition, first un-allocate/delete, then select that free space and click on Add. Then specify the details like -
- Partition Type – ‘Primary’
- File System – ‘Ext4′
- Mount Point – ‘/’
- Beginning
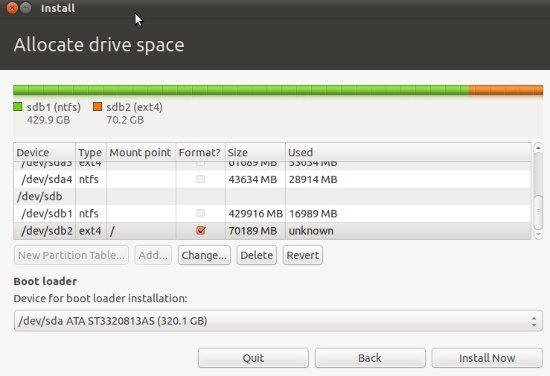
Then click on ‘Install Now’ button to proceed.
step #5 : Now Enter some basic information during the installation procedure and hit Forward button.
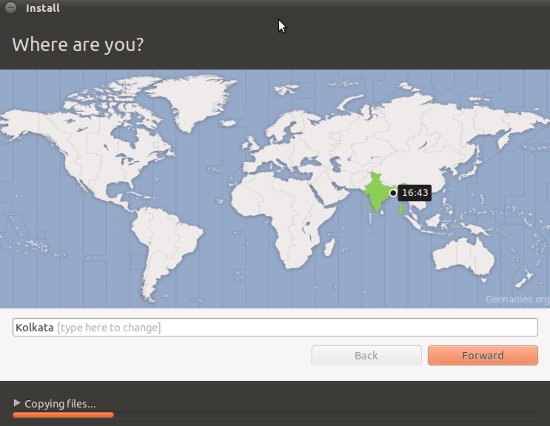
Your Geo-Graphical Location – Select your country from the Map
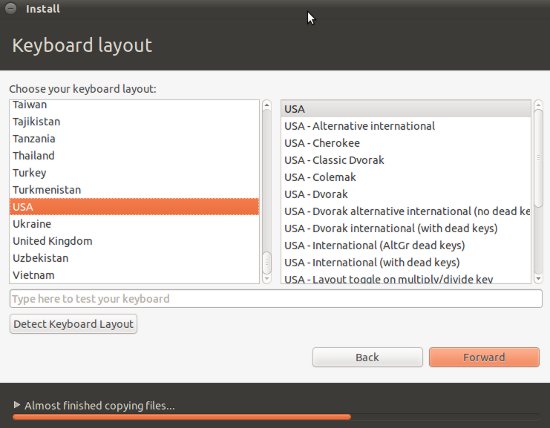
Then, select the keyboard Layout, leave it default if you aren’t sure.
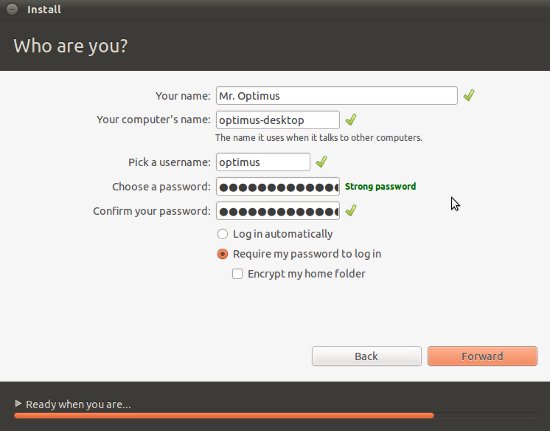
Then Enter some basic information like – Your Name , Computer Name, Login Info (Username, and Password).
Then relax (or You may skip some language packs during the installation to reduce the installation time) until the installation is complete.
step #6 : That’s All. Did you expect more steps, sorry to disappoint you.. Restart the computer.
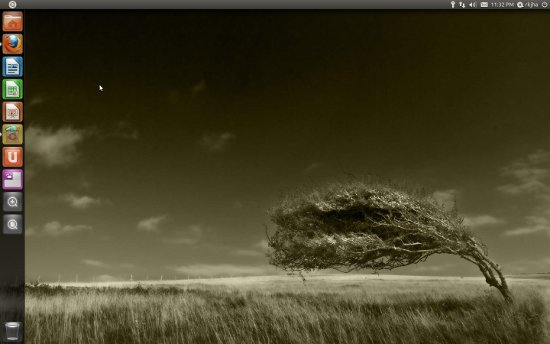
Here is a Snapshot of Fresh installed Ubuntu 11.04 (If you don’t like the default desktop unity then switch to the GNOME in the login window)-
Installing Ubuntu 11.04 from CD
Procedure is same as described above, just skip the 2nd,3rd and 4th steps, Instead of that burn the ISO file to CD or DVD and restart your computer. Then follow the steps 4 and 5 as described above.
If you have any problem during installation, then let us know, Reply through the comment box.
Visit the Source of this Tutorial Sudobitsto configuration after instal ubuntu 10:10 visit here ubuntu 10:10(1) and ubuntu 10:10(2)
Have Fun! with Ubuntu 11.04


3 Responses to "Tutorial Install Ubuntu 11:04"
plenty of valuable facts, thanks for providing these information.
Swimming Tips
Here is my web-site ; Swimming Tips
My page: weightloss tea
what you are speaking about! Bookmarked. Kindly additionally consult with my site =).
We could have a hyperlink exchange agreement
between us
my page - rapid weightloss
Post a Comment